figma-exporter
Introduction: Easily export assets of png/jpg/webp/svg/pdf for Web/Android/Flutter/iOS/ReactNative.
Tags:
Figma Exporter
Easily export assets as PNG/JPG/WebP/SVG/PDF for Web, Android, Flutter, iOS, React Native
View in Figma »
Issues & Features
·
☕ Support the Project
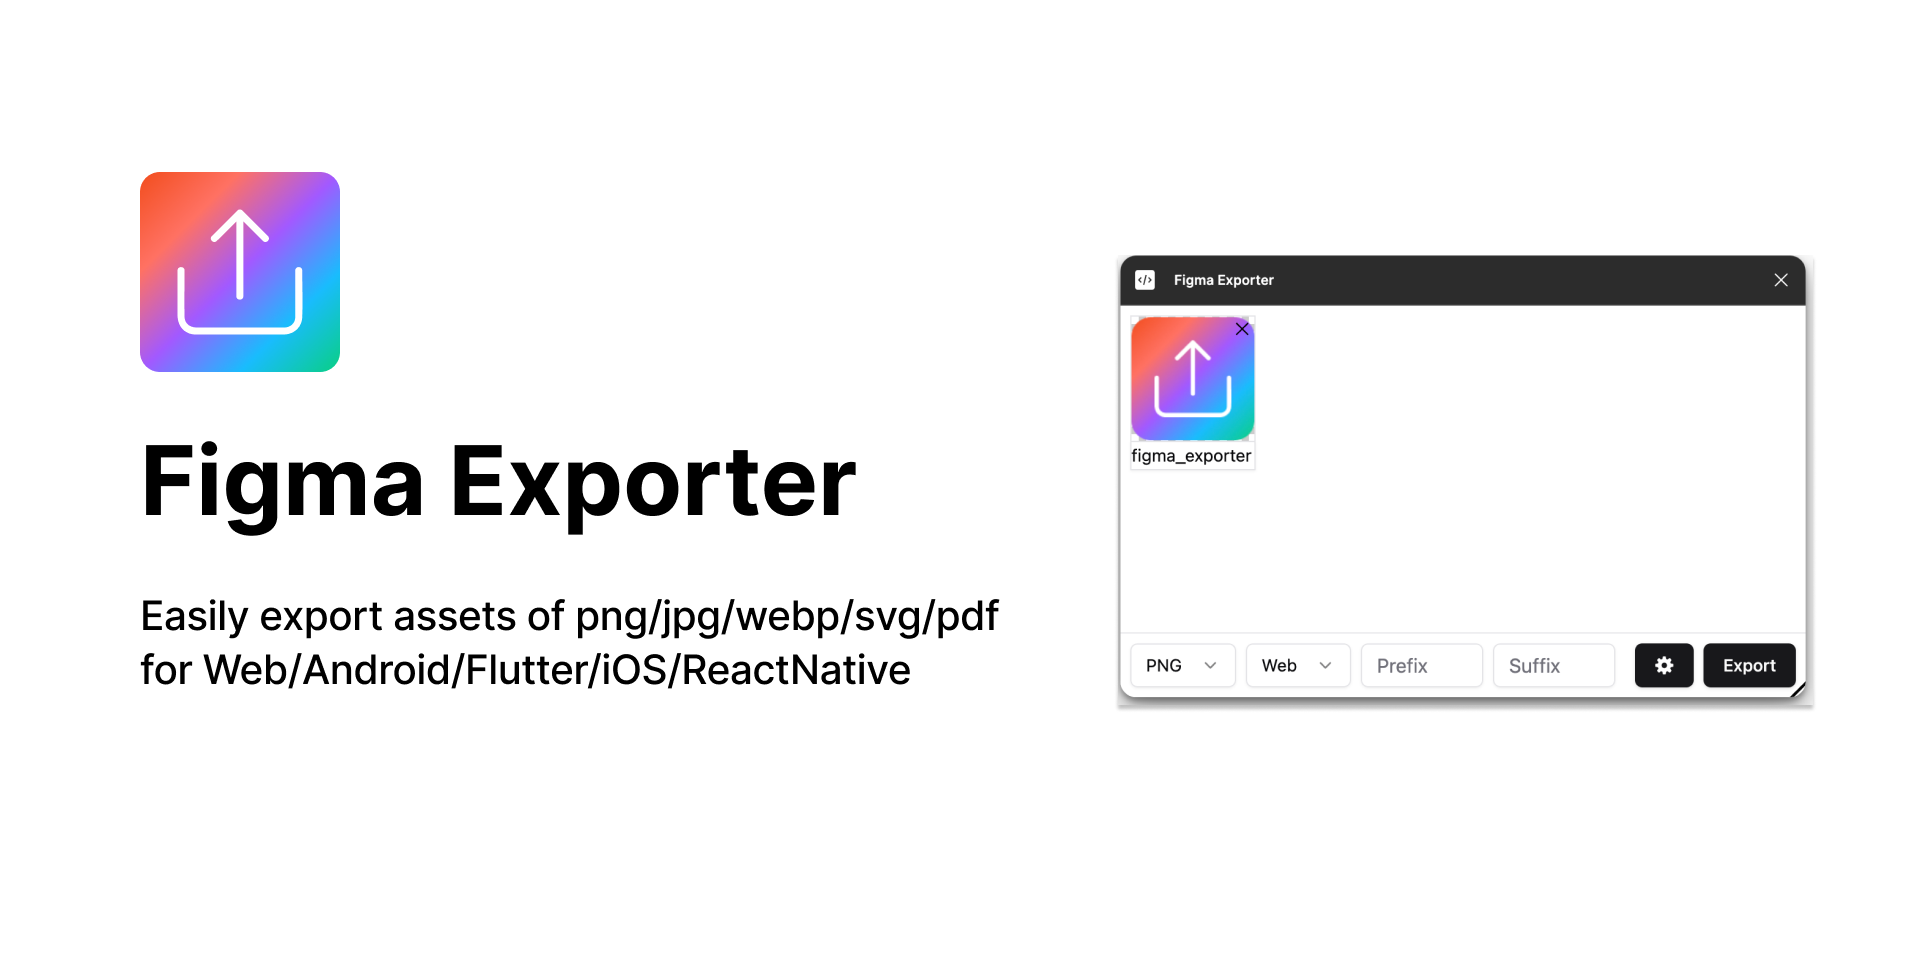
- 🎨 Multiple Export Formats: Export as PNG, JPG, WebP, SVG, or PDF
- 📱 Platform Optimized: Tailored exports for Web, Android, Flutter, iOS, and React Native
- ⚡ Batch Export: Export multiple assets at once
- 🔧 Customizable Settings: Configure export parameters to fit your needs
Installation
- Open Figma
- Go to Plugins > Browse plugins in Community
- Search for "Figma Exporter"
- Click Install
⚠️ Note: This plugin requires write access to your Figma file to function properly.
How to Use
- Select the frames or components you want to export
- Right-click and choose Plugins > Figma Exporter
- Choose your export format and platform settings
- Click Export to download your assets
Export Structure
When exporting for different platforms, assets are organized as follows:
├── Web
│   └── img.png
├── Android
│   ├── drawable-mdpi
│   │   └── img.png
│   ├── drawable-hdpi
│   │   └── img.png
│   ├── drawable-xhdpi
│   │   └── img.png
│   ├── drawable-xxhdpi
│   │   └── img.png
│   └── drawable-xxxhdpi
│       └── img.png
├── iOS
│   ├── img.png
│   ├── img@2x.png
│   └── img@3x.png
├── Flutter
│   ├── 1.5x
│   │   └── img.png
│   ├── 2x
│   │   └── img.png
│   ├── 3x
│   │   └── img.png
│   ├── 4x
│   │   └── img.png
│   └── img.png
└── React Native
    ├── img.png
    ├── img@2x.png
    └── img@3x.png
For Developers
Project Structure
src/
├── plugin/          # Figma plugin code (runs in Figma's sandbox)
│   ├── code.ts      # Main plugin logic
│   └── data.ts      # Data processing utilities
├── ui/              # Plugin UI (React/Preact components)
│   ├── App.tsx      # Main application component
│   ├── components/  # Reusable UI components
│   ├── page/        # Page components
│   └── lib/         # Utility libraries
└── common/          # Shared types and utilities
    ├── enum.ts      # Enums and constants
    ├── interface.ts # TypeScript interfaces
    └── base64.ts    # Base64 utilities
Development Setup
Prerequisites
node >= 18
pnpm >= 8
Install dependencies
pnpm installDevelopment
# Start development server with hot reload
pnpm dev

# Watch TypeScript compilation
pnpm tsc:watch

# Watch build process
pnpm build:watch
Testing in Figma
- Open Figma Desktop
- Go to Plugins > Development > Import plugin from manifest
- Select
manifest.jsonfrom this project
Available Scripts
| Command | Description |
|---|---|
pnpm dev |
Start development with hot reload |
pnpm build |
Build for production |
pnpm test |
Run TypeScript check and build |
pnpm lint |
Run ESLint with auto-fix |
pnpm format |
Format code with Prettier |
pnpm tsc |
Type check both plugin and UI code |
Tech Stack
- Framework: Preact (React compatible)
- Build Tool: Vite + ESBuild
- Styling: TailwindCSS
- State Management: Zustand
- UI Components: Radix UI
- Type Checking: TypeScript
- Linting: ESLint
- Formatting: Prettier
Architecture
The plugin follows Figma's architecture pattern:
- Plugin Code (
src/plugin/): Runs in Figma's sandbox, handles Figma API calls - UI Code (
src/ui/): Runs in iframe, handles user interface - Communication: PostMessage API between plugin and UI
Key Libraries
@figma/plugin-typings: Figma API typesfflate: ZIP compression for batch exportswebp-converter-browser: WebP format conversionbrowser-image-compression: Image optimizationsuperstruct: Runtime type validation
Building for Production
pnpm build
This creates optimized bundles in the dist/ directory ready for Figma plugin submission.
Contributing
- Fork the repository
- Create a feature branch:
git checkout -b feature/amazing-feature - Make your changes
- Run tests:
pnpm test - Commit changes:
git commit -m 'Add amazing feature' - Push to branch:
git push origin feature/amazing-feature - Open a pull request
