dexshellerInMemory
本文目的:通过内存加载 DEX 文件技术,完成一键 DEX 加固脚本
使用说明
python sheller.py -f xxx.apk
加固原理
和我的另一个项目Native 层 DEX 一键加固脚本基本一样,只是多了一步,引入了内存加载 DEX 技术
一键加固脚本实现步骤
- 准备原 DEX 加密算法以及隐藏位置(壳 DEX 尾部)
        """
        1. 第一步:确定加密算法
        """
        inKey = 0xFF
        print("[*] 确定加密解密算法,异或: {}".format(str(inKey)))
- 生成壳 DEX。(壳 Application 动态加载原 application 中需要原 application 的 name 字段)
        """
        2. 第二步:准备好壳 App
        """
        # 反编译原 apk
        decompAPK(fp)
        # 获取 Applicaiton name 并保存到壳 App 源码中
        stSrcDexAppName = getAppName(fp)
        save_appName(stSrcDexAppName)
        # 编译出壳 DEX
        compileShellDex()
        print("[*] 壳 App 的 class 字节码文件编译为:shell.dex 完成")
- 修改原 APK 文件中的 AndroidManifest.xml 文件的 applicationandroid:name 字段,实现从壳 application 启动
        """
        3. 第三步:修改原 apk AndroidManifest.xml 文件中的 Application name 字段为壳的 Application name 字段
        """
        # 替换壳 Applicaiton name 到原 apk 的 AndroidManifest.xml 内
        replaceTag(fp, "cn.yongye.nativeshell.StubApp")
        print("[*] 原 apk 文件 AndroidManifest.xml 中 application 的 name 字段替换为壳 application name 字段完成")
- 加密原 DEX 到壳 DEX 尾部并将壳 DEX 替换到原 APK 中
        """
        4. 替换原 apk 中的 DEX 文件为壳 DEX
        """
        replaceSDexToShellDex(os.path.join(stCurrentPt, "result.apk"))
        print("[*] 壳 DEX 替换原 apk 包内的 DEX 文件完成")
- 添加脱壳 lib 库到原 apk 中
        """
        5. 添加脱壳 lib 库到原 apk 中
        """
        addLib("result.apk")
- apk 签名
        """
        6. apk 签名
        """
        signApk(os.path.join(stCurrentPt, "result.apk"), os.path.join(stCurrentPt, "demo.keystore"))
        print("[*] 签名完成,生成 apk 文件: {}".format(os.path.join(stCurrentPt, "result.apk")))
内存加载 DEX
了解内存加载 DEX 文件内存加载技术之前,我们需要了解 DEX 文件加载这一过程。
**DEX 文件加载过程:**即下面左图所示的 API 调用链就是加载过程。DEX 文件加载的核心是最后一层,通过 Native 层函数传入 DEX 文件从而获取一个 cookie 值
所以我们要实现内存加载 DEX的话,不仅需要自己重写这套 DEX 文件调用链,最主要的是寻找一个 Native 层 API 实现传入 DEX 文件字节流来获取 cookie 值,就是下面右图所示调用链,API 即 openMemory(4.3 ART 虚拟机以后, 4.3 及其以前 Dalvik 虚拟机用 openDexFile([byte...)API)即可实现这样的功能

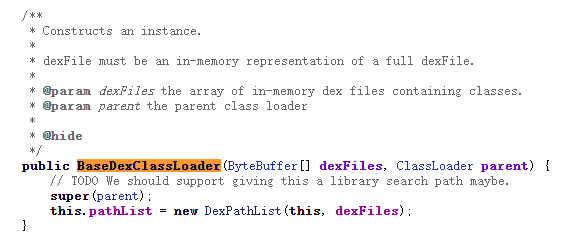
Android 8 以后 BaseDexClassLoader 类就有内存加载的能力,参考 Android 8 源码,已经加入了这样的接口,我们只需要将相关代码文件 copy 下来,将最底层的 Native 函数用 openMemory 替代即可
自定义 MyDexClassLoader
通过 dlopen 和 dlsym 的方法找到 openMemory 函数实现核心函数即可
JNICALL extern "C"
JNIEXPORT jlong JNICALL
Java_cn_yongye_inmemoryloaddex_DexFile_createCookieWithArray(JNIEnv *env, jclass clazz,
                                                             jbyteArray buf, jint start, jint end) {
    // TODO: implement createCookieWithArray()
    void *artlib =  fake_dlopen("/system/lib/libart.so", RTLD_LAZY);
    if(!artlib){
        exit(0);
    }
    org_artDexFileOpenMemory22 openMemory22 = (org_artDexFileOpenMemory22)fake_dlsym(artlib,
                                                                        "_ZN3art7DexFile10OpenMemoryEPKhjRKNSt3__112basic_stringIcNS3_11char_traitsIcEENS3_9allocatorIcEEEEjPNS_6MemMapEPKNS_7OatFileEPS9_");

    if(!openMemory22){
        exit(0);
    }
    jbyte *bytes;
    char *pDex  = NULL;
    std::string location = "";
    std::string err_msg;


    bytes = env->GetByteArrayElements(buf, 0);
    int inDexLen = env->GetArrayLength(buf);
    pDex = new char[inDexLen + 1];
    memset(pDex, 0, inDexLen + 1);
    memcpy(pDex, bytes, inDexLen);
    pDex[inDexLen] = 0;
    env->ReleaseByteArrayElements(buf, bytes, 0);
    const Header *dex_header = reinterpret_cast<const Header *>(pDex);
    void *value = openMemory22((const unsigned char *)pDex, inDexLen, location, dex_header->checksum_, NULL, NULL, &err_msg);

    jlong cookie = replace_cookie(env, value, 22);
    return cookie;

}
还需要实现 DEX 加载器另外一个重要功能,即加载类的能力,这个功能本来也是需要 Native 函数实现的,这里我们可以通过反射调用 DexFile 类的 defineClass 方法(加载类的调用链是:findClass->defineClass)实现
private Class defineClass(String name, ClassLoader loader, Object cookie,
                              DexFile dexFile, List<Throwable> suppressed) {
        Class result = null;
        try {
            Class clsDexFile = Class.forName("dalvik.system.DexFile");
            Method mdDefineClass = clsDexFile.getDeclaredMethod("defineClass", String.class, ClassLoader.class, long.class, List.class);
            mdDefineClass.setAccessible(true);
            result = (Class) mdDefineClass.invoke(null, name, loader, cookie, suppressed);
        } catch (NoClassDefFoundError e) {
            if (suppressed != null) {
                suppressed.add(e);
            }
        } catch (ClassNotFoundException e) {
            if (suppressed != null) {
                suppressed.add(e);
            }
        } catch (NoSuchMethodException e) {
            e.printStackTrace();
        } catch (IllegalAccessException e) {
            e.printStackTrace();
        } catch (InvocationTargetException e) {
            e.printStackTrace();
        }
        return result;
    }
Cmake、ninja 编译 cpp 文件
native 层代码源文件在 cpp 目录下,可以直接调用 cpp/build.bat 一键编译批处理文件
cmake 生成 ninja 编译配置文件
D:\Android\Sdk\cmake\3.10.2.4988404\bin\cmake.exe . -DCMAKE_BUILD_TYPE=Debug -DCMAKE_TOOLCHAIN_FILE=D:\Android\Sdk\ndk\20.0.5594570\build\c make\android.toolchain.cmake -DANDROID_ABI=x86 -DANDROID_NDK=D:\Android\Sdk\ndk\20.0.5594570 -DANDROID_PLATFORM=android-16 -DCMAKE_ANDROID_ARCH_ABI=x86 -DCMAKE_ANDROID_NDK=D:\Android\Sdk\ndk\20.0.5594570 -DCMAKE_EXPORT_COMPILE_COMMANDS=ON -DCMAKE_MAKE_PROGRAM=D:\Android\Sdk\cmake\3.10.2.4988404\bin\ninja.exe -DCMAKE_SYSTEM_NAME=Android -DCMAKE_SYSTEM_VERSION=16 -GNinja
ninja 生成 so 文件
只是修改 cpp 文件,直接运行 ninja 命令,不用重新用 cmake 生成 ninja 配置文件 如果有新 cpp 文件的增加删除,还是需要删除配置文件,重新运行 cmake 的
D:\Android\Sdk\cmake\3.10.2.4988404\bin\ninja.exe
参考
【1】Android 中 apk 加固完善篇之内存加载 dex 方案实现原理(不落地方式加载)
【2】内存解密并加载 DEX
鼓励