DroidDesk
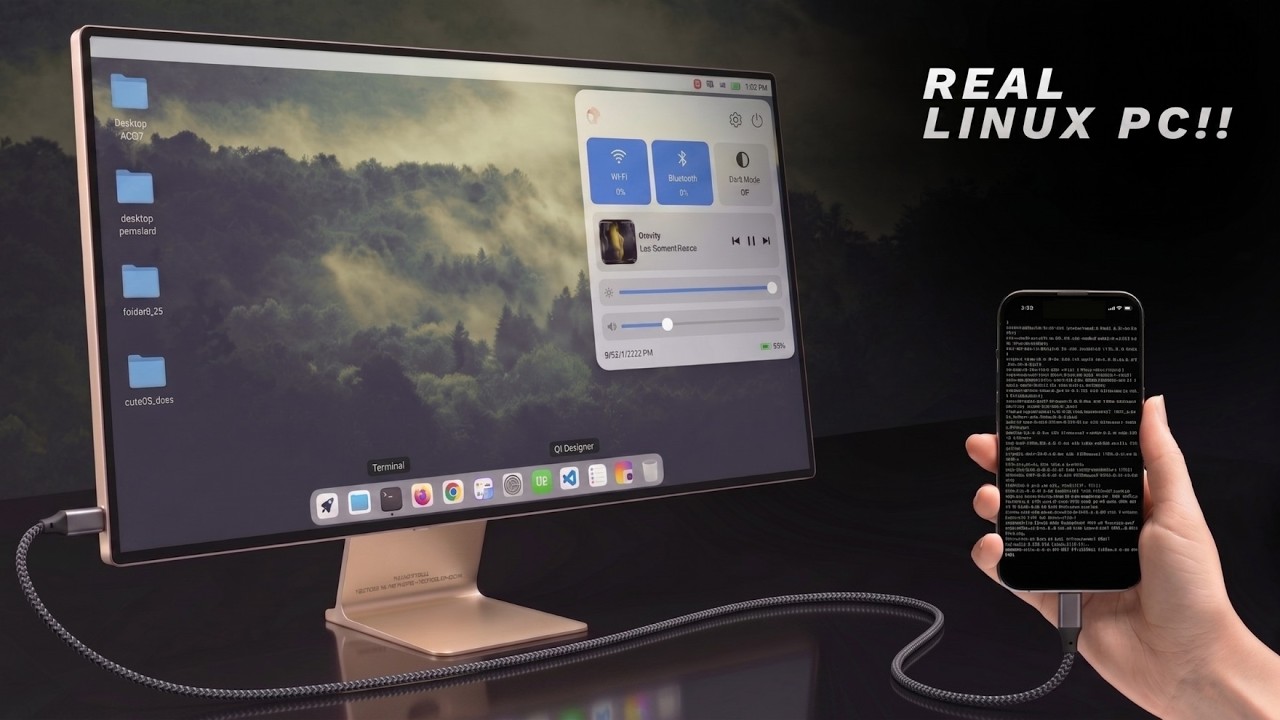
Run a full Linux desktop on any Android phone. Not a terminal. Not an emulator. A complete desktop environment with direct kernel access -- VS Code, Blender, Metasploit, local AI, all of it.
Connect your phone to a monitor and it becomes a Linux PC. Unplug it and your entire setup comes with you.
[!IMPORTANT] DroidDesk is an independent GPL-3.0 open-source project that incorporates modified Termux:X11 components. It is not affiliated with or endorsed by Termux, Termux:X11, TUR, Canonical, or Ubuntu.
- Source and licenses: https://github.com/orailnoor/DroidDesk
- Termux:X11 upstream: https://github.com/termux/termux-x11
Video
What This Actually Runs
Everything below has been tested and confirmed working:
- LibreOffice -- Word processing, spreadsheets, presentations. Fully functional.
- VS Code -- Full version. Python, PIP, extensions, everything.
- Claude Code -- AI coding agent running directly in terminal.
- Blender -- Installs and opens. Laggy on mobile hardware, but it runs.
- Wireshark -- Full network analysis, every packet and protocol.
- Metasploit -- Pentesting framework, runs fine.
- Local AI -- Offline LLM inference, 5+ tokens/second, no API needed.
If it runs on Ubuntu, it runs here.
How It Works
The Linux environment runs through Termux with direct access to the phone's kernel. No emulation, no translation -- native performance.
The setup script installs a full desktop (XFCE4/LXQt/MATE/KDE) inside Termux using the Termux User Repository (TUR) for GUI apps. For tools not available in TUR (Wireshark, Metasploit, etc.), a Proot container provides a standard Ubuntu/Debian/Kali environment where you install anything with apt.
The automatic menu sync scans what you install inside Proot and adds it directly to your desktop app menu. No need to enter the container every time.
DroidDesk App (Standalone)
DroidDesk is also available as a standalone Android application that completely automates this process without requiring a separate Termux installation. It renders through an embedded Termux:X11 server running in its own Android process; the app does not use VNC.
- Rooted phones: Run the Ubuntu filesystem through
chroot. - Non-rooted phones: Run an app-private native Termux userspace and install desktop packages from the X11 and TUR repositories. PRoot is not used.
- Rendering: Both modes connect directly to the embedded X11 server on
DISPLAY=:0. Adreno devices use Turnip/Zink hardware acceleration when available; other GPUs fall back to Mesa software rendering. - Automated setup: The app extracts the bundled ARM64 Termux bootstrap, configures its private package prefix, and installs the selected desktop automatically.
Download the latest release APK from the Releases tab and sideload it to begin.
Requirements
- Any Android phone (ARM64)
- Termux (install from F-Droid, not Play Store)
- Termux-X11 (for on-phone display)
For Monitor Output ( Optional )
Option A: USB-C Display Output If your phone supports display output over USB-C, just use a USB-C to HDMI adapter. Done.
Option B: Raspberry Pi Bridge For phones without display output (most mid-range phones with USB 2.0), use a Raspberry Pi Zero 2W as a bridge:
- Raspberry Pi Zero 2W with Raspberry Pi OS
- Micro USB to USB-C cable
- USB-C hub
- Micro HDMI to HDMI adapter
- SD card with Pi firmware
- Wireless keyboard and mouse
The Pi connects to the phone via USB tethering, detects the phone's IP automatically, and opens a VNC viewer to display the phone's desktop on the monitor.
Installation
Step 1: Install Termux
Download and install Termux from F-Droid: https://f-droid.org/en/packages/com.termux/
Do NOT use the Play Store version. It is outdated and will not work.
Step 2: Install Termux-X11
Download the latest APK from: https://github.com/termux/termux-x11/releases/tag/nightly
Install it on your phone. This is the display server that renders the desktop.
Step 3: Run the Setup Script
Open Termux and run:
curl -sL https://raw.githubusercontent.com/orailnoor/DroidDesk/main/termux-linux-setup.sh -o setup.sh
bash setup.sh
The script will:
- Update Termux packages
- Add X11 and TUR repositories
- Install your chosen desktop environment (XFCE4/LXQt/MATE/KDE)
- Set up GPU acceleration (Turnip for Adreno, Zink fallback for others)
- Install Firefox, Git, Python, and core tools
- Set up a Proot Linux container (Ubuntu/Debian/Kali)
- Create the App Bridge for automatic menu syncing
- Apply a modern dark theme
- Optionally set up VNC for remote access
Step 4: Start the Desktop
After installation completes:
bash ~/start-x11.sh
Then open the Termux-X11 app on your phone. Your desktop is ready.
Step 5: Install Apps Inside Proot
To install tools that are not in TUR:
bash ~/start-proot.sh
apt install wireshark    # or any other package
exit
bash ~/proot-menu-sync.sh
The app will appear in your desktop menu automatically.
Raspberry Pi Monitor Bridge Setup
If you are using a Raspberry Pi Zero 2W to output to a monitor:
Step 1: Flash Raspberry Pi OS
Flash standard Raspberry Pi OS to an SD card and boot the Pi.
Step 2: Install VNC Viewer on the Pi
sudo apt update
sudo apt install realvnc-vnc-viewer
Step 3: Copy the Launcher Script
Copy pi-launch_phone.sh to your Pi:
curl -sL https://raw.githubusercontent.com/orailnoor/DroidDesk/main/pi-launch_phone.sh -o ~/pi-launch_phone.sh
chmod +x ~/pi-launch_phone.sh
Step 4: Connect and Launch
- Connect the phone to the Pi via USB cable
- Enable USB Tethering on the phone
- Start VNC on the phone:
bash ~/start-vnc.sh(in Termux) - Run the bridge script on the Pi:
bash ~/pi-launch_phone.sh
The script auto-detects the phone's IP and opens a fullscreen VNC session on the monitor.
Optional: Auto-Launch on Boot
To make the Pi automatically connect when powered on, add to crontab:
crontab -e
Add this line:
@reboot sleep 15 && /home/pi/pi-launch_phone.sh
Commands Reference
| Command | What It Does |
|---|---|
bash ~/start-x11.sh |
Start desktop via Termux-X11 |
bash ~/start-vnc.sh |
Start desktop via VNC (if installed) |
bash ~/start-proot.sh |
Open Proot Linux shell |
bash ~/proot-menu-sync.sh |
Sync Proot apps to desktop menu |
bash ~/stop-linux.sh |
Stop all sessions |
Notes
[!WARNING] Disable Child Process in Developer Options On some Android versions (MIUI, One UI, stock Android 13+), the system may kill Termux background processes and drop your desktop session. To prevent this:
- Go to Settings → Developer Options
- Find "Child process" (may be labeled differently depending on your ROM)
- Disable child process restrictions for Termux
Without this, long-running sessions (VNC, Termux-X11) may be killed by the OS without warning.
- Termux-X11 directly on the phone is faster than VNC. Use VNC only when you need monitor output through the Pi bridge or remote access from another device.
- For standalone phone use without a monitor, Termux-X11 is the recommended option.
- The Proot container shares the display with the native Termux desktop. Apps installed in Proot render on the same screen.
- GPU acceleration works best on Adreno GPUs (Qualcomm Snapdragon phones). Other GPUs fall back to software rendering.
Credits
Created by orailnoor
License and third-party software
DroidDesk is independent software licensed under GNU GPL version 3 only. It is not affiliated with or endorsed by Termux, Termux:X11, TUR, Canonical, Ubuntu, or other upstream projects.
The Android application incorporates GPL-licensed Termux:X11 components and bundles other third-party software under their respective licenses. See:
The current compliance checklist includes unresolved source provenance, reproducible-build, custom-prefix bootstrap, and wallpaper-license work. Do not describe a binary release as fully compliant until the blocking checklist items are complete.