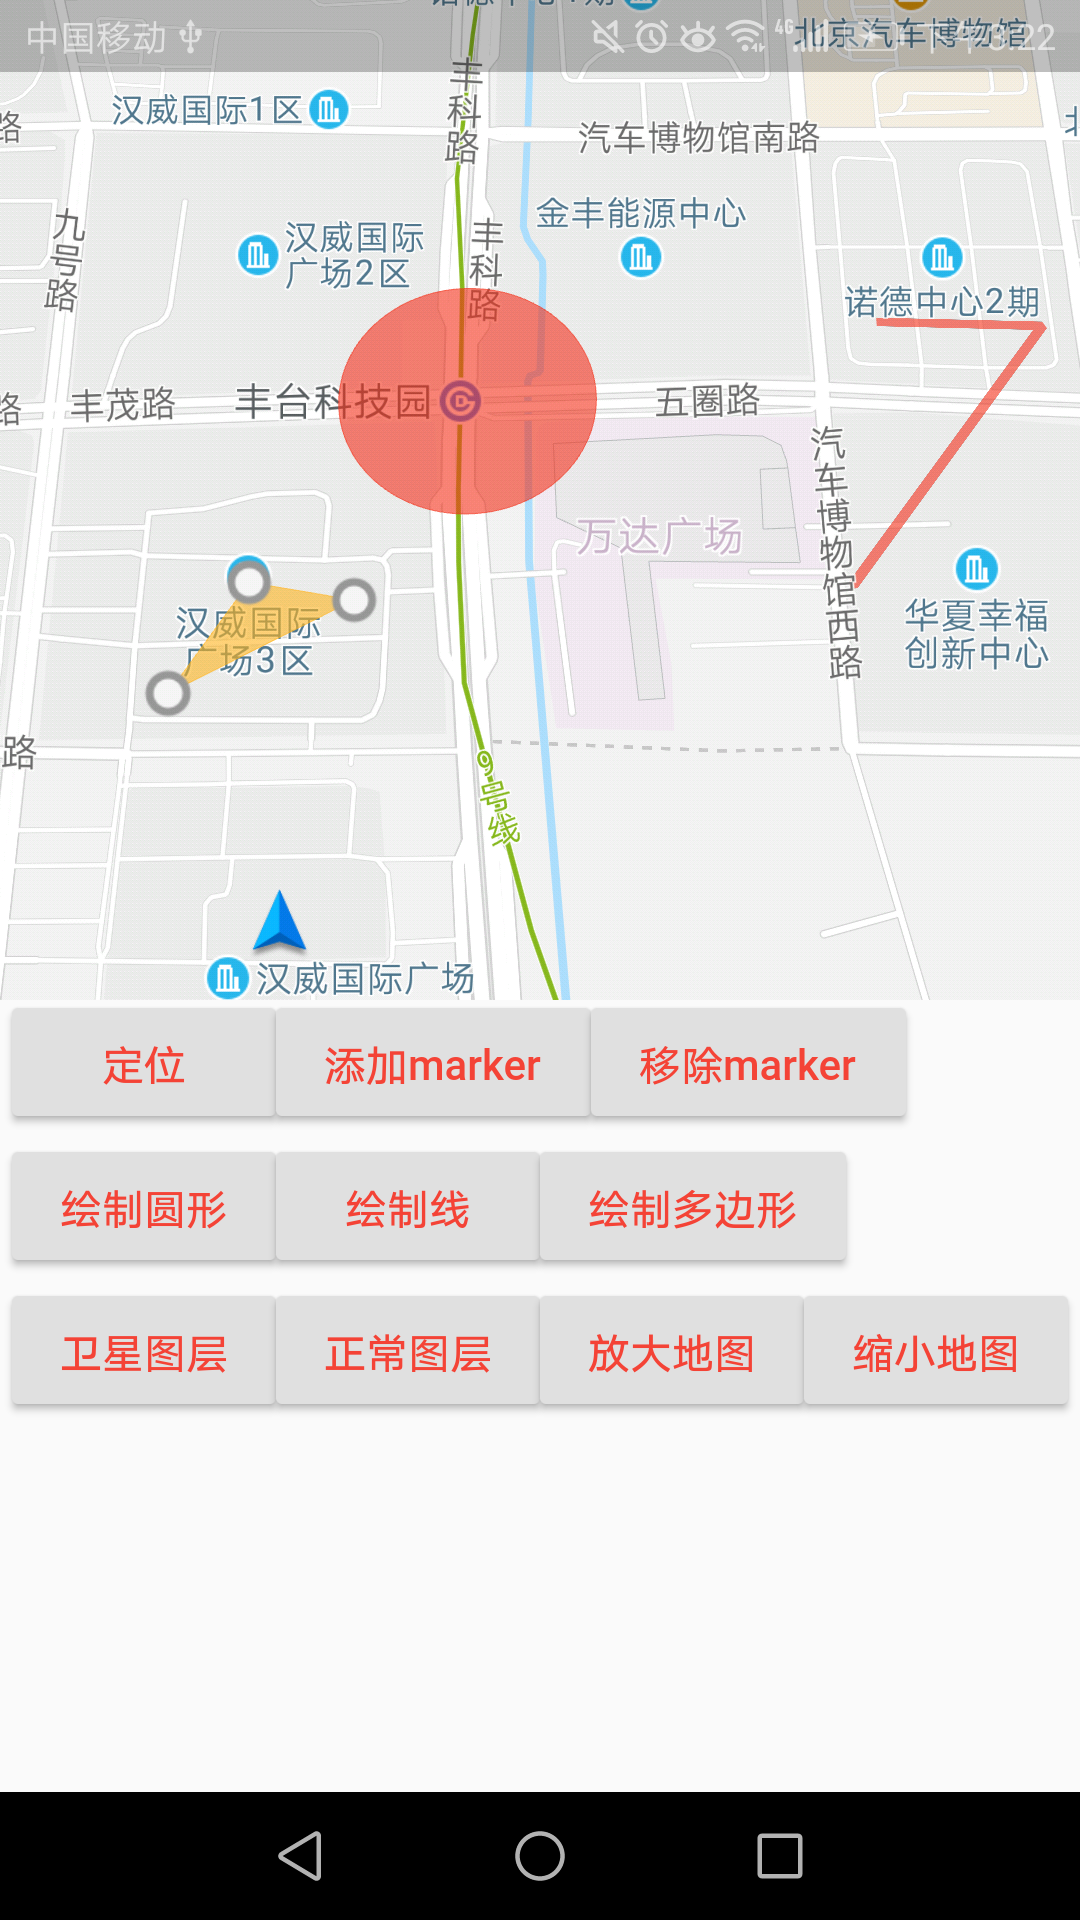
base_mapview
Introduction: 高德地图 flutter 插件
Tags:
A new Flutter MapView plugin.
高德地图插件

Getting Started
集成高德地图 android 版本
1、先申请一个 apikey http://lbs.amap.com/api/android-sdk/guide/create-project/get-key
2、在 AndroidManifest.xml 中增加
 <meta-data
            android:name="com.amap.api.v2.apikey"
            android:value="你的 Key" />
3、增加对应的权限:
<uses-permission android:name="android.permission.WRITE_EXTERNAL_STORAGE" />
    <uses-permission android:name="android.permission.ACCESS_COARSE_LOCATION" />
    <uses-permission android:name="android.permission.ACCESS_NETWORK_STATE" />
    <uses-permission android:name="android.permission.ACCESS_FINE_LOCATION" />
    <uses-permission android:name="android.permission.READ_PHONE_STATE" />
    <uses-permission android:name="android.permission.CHANGE_WIFI_STATE" />
    <uses-permission android:name="android.permission.ACCESS_WIFI_STATE" />
    <uses-permission android:name="android.permission.CHANGE_CONFIGURATION" />
    <uses-permission android:name="android.permission.WAKE_LOCK" />
How to use
先导入 dart 包 修改 pubspec.yaml,增加依赖:
dependencies:
  base_mapview: ^0.0.7
在要用的地方导入:
import 'package:base_mapview/base_mapview.dart';
然后就可以使用了
import 'package:base_mapview/local_weather_live.dart';
import 'package:base_mapview/regeocode_address.dart';
import 'package:base_mapview/tip.dart';
import 'package:base_mapview/lat_lng.dart';
import 'package:flutter/material.dart';
import 'package:base_mapview/wms.dart';
import 'package:base_mapview/amap_view.dart';

void main() => runApp(MyApp());

class MyApp extends StatefulWidget {
  @override
  _MyAppState createState() => _MyAppState();
}

class _MyAppState extends State<MyApp> with WidgetsBindingObserver {
  List _list = [
    LatLng(43.99791, 125.397968).toMap(),
    LatLng(39.833876, 116.301886).toMap(),
    LatLng(39.823862, 116.295385).toMap(),
    LatLng(39.823734, 116.296299).toMap(),
    LatLng(39.823083, 116.294776).toMap()
  ];

  List _polylinelist = [
    LatLng(39.82588, 116.30102).toMap(),
    LatLng(39.825847, 116.302554).toMap(),
    LatLng(39.823853, 116.300612).toMap(),
  ];

  List _polygonlist = [
    LatLng(39.823862, 116.295385).toMap(),
    LatLng(39.823734, 116.296299).toMap(),
    LatLng(39.823083, 116.294776).toMap(),
  ];

  Wms _wms = Wms(true, true, true, true, true, true);

  Key _key0;

  @override
  void initState() {
    _key0 = AMapView.createKey(_key0);
    super.initState();
  }

  @override
  Widget build(BuildContext context) {
    var mywidget = Column(
      crossAxisAlignment: CrossAxisAlignment.start,
      children: <Widget>[
        AMapView(
          key: _key0,
          mapType: MapType.satellite,
          centerCoordinate: LatLng(43.99791, 125.397968),
          zoomLevel: 10,
          onLocationChange: (LatLng latlng) {
            print(latlng.toString());
          },
          onGetInputtips: (List<Tip> datalist) {
            for (Tip tip in datalist) {
              print("flutter 提示信息:$tip");
            }
          },
          onCameraChange: (LatLng latlng) {
            print("中心点:" + latlng.toString());
          },
          onRegeocodeSearched: (RegeocodeAddress address) {
            print(address.toString());

            //获取天气信息
            AMapView.channel.invokeMethod("queryWeatherbyCity", {
              "mapView": {"city": address.city}
            });
          },
          onWeatherLiveSearched: (LocalWeatherLive weather) {
            print("实时天气:" +
                weather.city +
                "-温度" +
                weather.temperature +
                "-天气" +
                weather.weather);
          },
          onMarkerClick: (LatLng latlng) {
            print("marker click:" + latlng.toString());
          },
          wms: _wms,
          widthPercent: 0.6,
          heightPercent: 0.8,
        ),
        Wrap(
          children: <Widget>[
            RaisedButton(
              onPressed: () {
                AMapView.channel.invokeMethod("location");
              },
              child: Text(
                "定位",
                style: TextStyle(color: Colors.red),
              ),
            ),
            RaisedButton(
              onPressed: () {
                AMapView.channel.invokeMethod(
                  "addmarker",
                  {
                    "mapView": {"markerlist": _list}
                  },
                );
              },
              child: Text(
                "添加 marker",
                style: TextStyle(color: Colors.red),
              ),
            ),
            RaisedButton(
              onPressed: () {
                AMapView.channel.invokeMethod("removemarker");
              },
              child: Text(
                "移除 marker",
                style: TextStyle(color: Colors.red),
              ),
            ),
            RaisedButton(
              onPressed: () {
                AMapView.channel.invokeMethod(
                  "drawcircle",
                  {
                    "mapView": {
                      "roundcenter": LatLng(39.825262, 116.297241).toMap(),
                      "radius": 100.0,
                    }
                  },
                );
              },
              child: Text(
                "绘制圆形",
                style: TextStyle(color: Colors.red),
              ),
            ),
            RaisedButton(
              onPressed: () {
                AMapView.channel.invokeMethod(
                  "drawpolylin",
                  {
                    "mapView": {"polylinlist": _polylinelist}
                  },
                );
              },
              child: Text(
                "绘制线",
                style: TextStyle(color: Colors.red),
              ),
            ),
            RaisedButton(
              onPressed: () {
                AMapView.channel.invokeMethod(
                  "drawPolygon",
                  {
                    "mapView": {"polygonlist": _polygonlist}
                  },
                );
              },
              child: Text(
                "绘制多边形",
                style: TextStyle(color: Colors.red),
              ),
            ),
            RaisedButton(
              onPressed: () {
                AMapView.channel.invokeMethod(
                  "setMapType",
                  {
                    "mapView": {"mapType": 2}
                  },
                );
              },
              child: Text(
                "卫星图层",
                style: TextStyle(color: Colors.red),
              ),
            ),
            RaisedButton(
              onPressed: () {
                AMapView.channel.invokeMethod(
                  "setMapType",
                  {
                    "mapView": {"mapType": 1}
                  },
                );
              },
              child: Text(
                "正常图层",
                style: TextStyle(color: Colors.red),
              ),
            ),
            RaisedButton(
              onPressed: () {
                AMapView.channel.invokeMethod("zoomOut");
              },
              child: Text(
                "放大地图",
                style: TextStyle(color: Colors.red),
              ),
            ),
            RaisedButton(
              onPressed: () {
                AMapView.channel.invokeMethod("zoomIn");
              },
              child: Text(
                "缩小地图",
                style: TextStyle(color: Colors.red),
              ),
            ),
            RaisedButton(
              onPressed: () {
                AMapView.channel.invokeMethod(
                  "queryInputeData",
                  {
                    "mapView": {"keyword": "北京"}
                  },
                );
              },
              child: Text(
                "搜索提示",
                style: TextStyle(color: Colors.red),
              ),
            ),
            RaisedButton(
              onPressed: () {
                Wms wms = Wms(true, true, true, true, true, true);
                AMapView.channel.invokeMethod(
                  "initWms",
                  {"mapView": wms.toMap()},
                );
              },
              child: Text(
                "添加 wms 图层",
                style: TextStyle(color: Colors.red),
              ),
            ),
          ],
        )
      ],
    );

    return MaterialApp(
      home: Scaffold(
        body:SingleChildScrollView(
          child: mywidget,
        )
      ),
    );
  }
}
特性
- [x] android 支持
- [x] 不需要添加任何支持即可显示地图,无需 Activity 和 Controller
- [x] 3D 地图的显示
- [x] 地图的定位
- [x] 添加 marker,移除 marker
- [x] 绘制圆形,绘制线,绘制多边形
- [x] 设置地图缩放层级,放大地图,缩放地图
- [x] 添加 wms 图层
- [x] 获取 POI 数据
- [x] 获取天气数据
- [ ] 更多 api
