TimerView
A timer which extends a View, you can use it to start a countdown if you need.

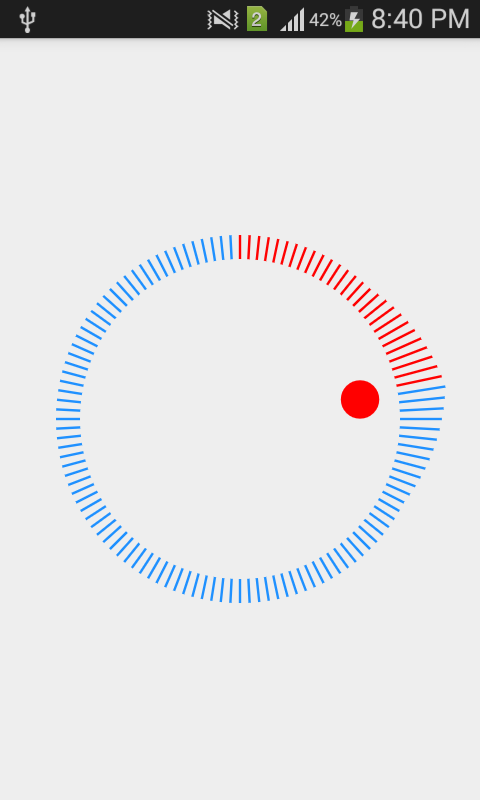
Screen Shoot
Usage
Copy the TimerView.java into your project. Then directly use TimerView element in xml like this:
    <com.ym.littleshape.TimerView
        android:layout_width="match_parent"
        android:layout_height="match_parent"
        android:id="@+id/timer_view"
        android:padding="0dp" />
Where com.ym.littleshape is your package name
And in Java:
timerView = (TimerView)findViewById(R.id.timer_view);
And then there will be a basic TimerView in your Activity: a circle and a point in the center.
Now you can use
timerView.startCountDown(long millis);
timerView.cancelCountDown();
to start a timer for countdown or interruput it.
The end of the countdown can be listened: use
setOnEndCountDownListener(OnEndCountDownListener listener)
to set the listener and implement your callback.
Methods
You can use several methods in timerView to customize your TimerView
- startCountDown(long millis)
cancelCountDown()
setCountDownInMillis(long countDownInMillis)
setGravityEnable(boolean enable)
- setBallClickEnable(boolean enable)
- setDefaultStartSettingEnable(boolean enable)
setDefaultStartCountDownEnable(boolean enable)
setOnStartCountDownListener(OnStartCountDownListener listener)
- setOnEndCountDownListener(OnEndCountDownListener listener)
- setOnCancelCountDownListener(OnCancelCountDownListener listener)
- setOnBallClickListener(OnBallClickListener listener)
- setOnBallLongClickListener(OnBallLongClickListener listener)
- setOnStartInteractiveSettingListener(OnStartInteractiveSettingListener listener)
- setOnConfirmInteractiveSettingListener(OnConfirmInteractiveSettingListener listener)
setOnCancelInteractiveSettingListener(OnCancelInteractiveSettingListener listener)
registerGravitySensor()
unregisterGravitySensor()
storeState()
restoreState(int rimColor)
cancelInteractiveSetting()
isSettingState()
Example
Here are some typical usage example:
Ball affected by gravity
The little point in the center of the circle can move under the affect of gravity
    @Override
    protected void onCreate(Bundle savedInstanceState) {
        ...
        timerView.setGravityEnable(true);
    }

    @Override
    protected void onResume() {
        super.onResume();
        timerView.registerGravitySensor();
    }

    @Override
    protected void onPause() {
        timerView.unregisterGravitySensor();
        super.onPause();
    }
Ball affected by shaking
Shake your phone, the ball bounce. Haha, a little funny?
    @Override
    protected void onCreate(Bundle savedInstanceState) {
        ...
        timerView.setShakeEnable(true);
    }

    @Override
    protected void onResume() {
        super.onResume();
        timerView.registerGravitySensor();
    }

    @Override
    protected void onPause() {
        timerView.unregisterGravitySensor();
        super.onPause();
    }
Ball can be click or long click
    @Override
    protected void onCreate(Bundle savedInstanceState) {
        ...
        timerView.setBallClickEnable(true);

        // then you can set these listeners for click callback
        timerView.setOnBallClickListener(new TimerView.OnBallClickListener() {
            @Override
            public void onBallClick() {
                Toast.makeText(MainActivity.this, "onBallClick", Toast.LENGTH_SHORT).show();
            }
        });
        timerView.setOnBallLongClickListener(new TimerView.OnBallLongClickListener() {
            @Override
            public void onBallLongClick() {
                Toast.makeText(MainActivity.this, "onBallLongClick", Toast.LENGTH_SHORT).show();
            }
        });
    }
Use the default way to start a countdown
In this case, keep touch the TimerView and shake your phone, the count down will start.
    @Override
    protected void onCreate(Bundle savedInstanceState) {

        ...
        timerView.setDefaultStartCountDownEnable(true);

        // set 5s countdown
        timerView.setCountDownInMillis(5000);

        // then you can set these listeners for callback
        timerView.setOnStartCountDownListener(new TimerView.OnStartCountDownListener() {
            @Override
            public void onStartCountDown(View v) {
                Toast.makeText(MainActivity.this, "onStartCountDown", Toast.LENGTH_SHORT).show();
            }
        });
        timerView.setOnEndCountDownListener(new TimerView.OnEndCountDownListener() {
            @Override
            public void onEndCountDown(View v) {
                Toast.makeText(MainActivity.this, "onEndCountDown", Toast.LENGTH_SHORT).show();
            }
        });
        timerView.setOnCancelCountDownListener(new TimerView.OnCancelCountDownListener() {
            @Override
            public void onCancelCountDown(View v) {
                Toast.makeText(MainActivity.this, "onCancelCountDown", Toast.LENGTH_SHORT).show();
            }
        });
    }

    @Override
    protected void onResume() {
        super.onResume();
        timerView.registerGravitySensor();
    }

    @Override
    protected void onPause() {
        timerView.unregisterGravitySensor();
        super.onPause();
    }
Use the default way to set your time for countdown
In this case, keep touch the ball and then you will come into setting mode, slide your finger on the screen can set the coundown(in minute).
    @Override
    protected void onCreate(Bundle savedInstanceState) {

        ...
        timerView.setDefaultStartSettingEnable(true);

        // the default way to start settint need to touch the ball
        timerView.setBallClickEnable(true);

        // then you can set these listeners for callback, such as a vibrating.
        timerView.setOnStartInteractiveSettingListener(new TimerView.OnStartInteractiveSettingListener() {
            @Override
            public void onStartInteractiveSetting(View v) {
                Toast.makeText(MainActivity.this, "onStartInteractiveSetting", Toast.LENGTH_SHORT).show();

                Vibrator vibrator = (Vibrator)getSystemService(Context.VIBRATOR_SERVICE);
                long [] pattern = {0, 100};
                vibrator.vibrate(pattern, -1);
            }
        });
        timerView.setOnConfirmInteractiveSettingListener(new TimerView.OnConfirmInteractiveSettingListener() {
            @Override
            public void onConfirmInteractiveSetting(View v) {
                Toast.makeText(MainActivity.this, "onConfirmInteractiveSetting", Toast.LENGTH_SHORT).show();

                Vibrator vibrator = (Vibrator)getSystemService(Context.VIBRATOR_SERVICE);
                long [] pattern = {0, 100};
                vibrator.vibrate(pattern, -1);
            }
        });
        timerView.setOnCancelInteractiveSettingListener(null);

    }

    @Override
    public void onBackPressed() {
        // here is a example to cancel setting
        if (timerView.isSettingState()) {
            timerView.cancelInteractiveSetting();
        } else {
            super.onBackPressed();
        }
    }
Keep your countdown state
If you want to continue your countdown after restart the app, here is the example. The method storeState() reStoreState() will keep the necessary data into SharedPrefernce.
    @Override
    protected void onCreate(Bundle savedInstanceState) {

        ...
        // 5 minutes
        timerView.startCountDown(300000);

        timerView.restoreState();

    }

    @Override
    protected void onPause() {

        timerView.storeState();

        super.onPause();
    }
