sample-simplepio
This Android Things app runs basic code that exercises the Peripheral I/O APIs. Each sample is an Android module that can be run independently.
Note: The Android Things Console will be turned down for non-commercial use on January 5, 2022. For more details, see the FAQ page.
Introduction
This sample provides an introduction to using the Peripheral I/O APIs on Android Things. You will learn the basic concepts of opening connections to various inputs and outputs for connecting with external peripherals in your app.
IMPORTANT: Please, note that these samples are not necessarily the easiest way to accomplish a task. In particular, they handle all low level I/O protocols directly, on purpose to showcase how to use the Peripheral APIs. In real world applications, you should use or develop a suitable driver that encapsulates the manipulation of low level APIs.
Screenshots
Blink

Button
PWM
Pre-requisites
- Android Things compatible board
- Android Studio 2.2+
For the Blink sample:
- Rainbow Hat for Android Things or the following individual components:
- 1 LED
- 1 resistor
- 2 jumper wires
- 1 breadboard
For the Button sample:
- Rainbow Hat for Android Things or the following individual components:
- 1 push button
- 1 resistor
- 2 jumper wires
- 1 breadboard
For the PWM sample:
- 1 servo
- 3 jumper wires
- external power source (recommended, depending on the servo)
Build and install
On Android Studio, select the module in the select box by the "Run" button, and then click on the "Run" button.
If you prefer to run on the command line, type
./gradlew <module>:installDebug
adb shell am start com.example.androidthings.simplepio/.<ModuleActivity>
Sample Specifics
Blink
If you have the Raspberry Pi Rainbow Hat for Android Things, just plug it onto your Raspberry Pi 3.
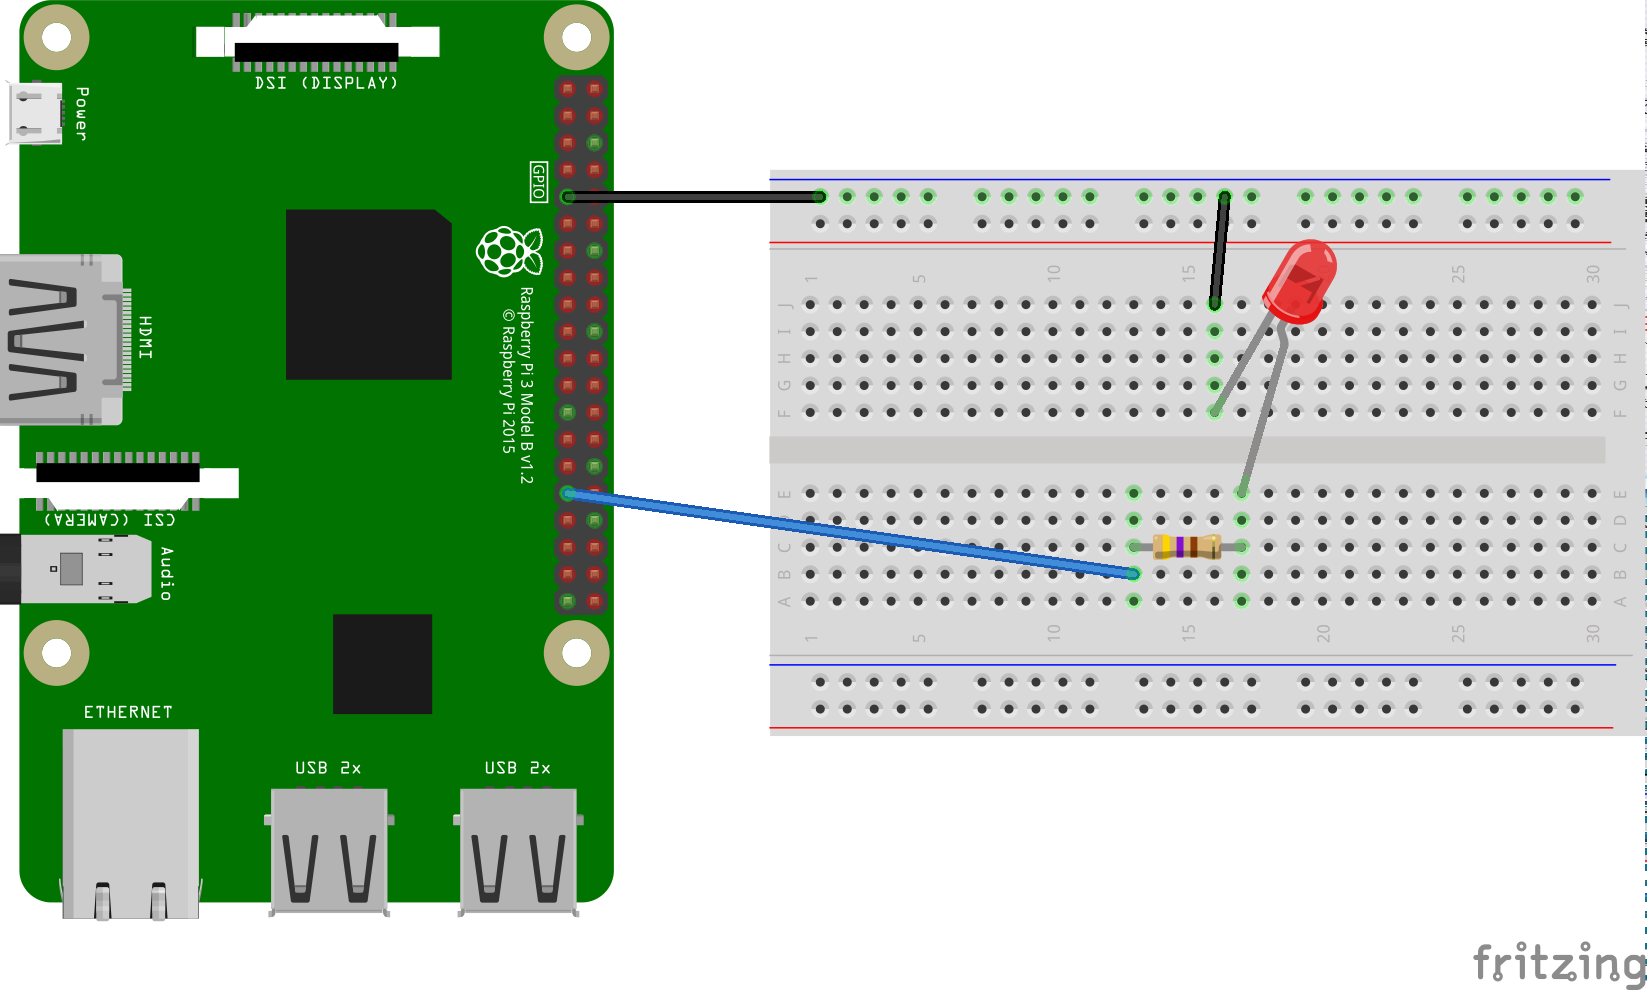
    ./gradlew blink:installDebug
    adb shell am start com.example.androidthings.simplepio/.BlinkActivity
Blinks an LED connected to a GPIO pin.
Button
If you have the Raspberry Pi Rainbow Hat for Android Things, just plug it onto your Raspberry Pi 3.
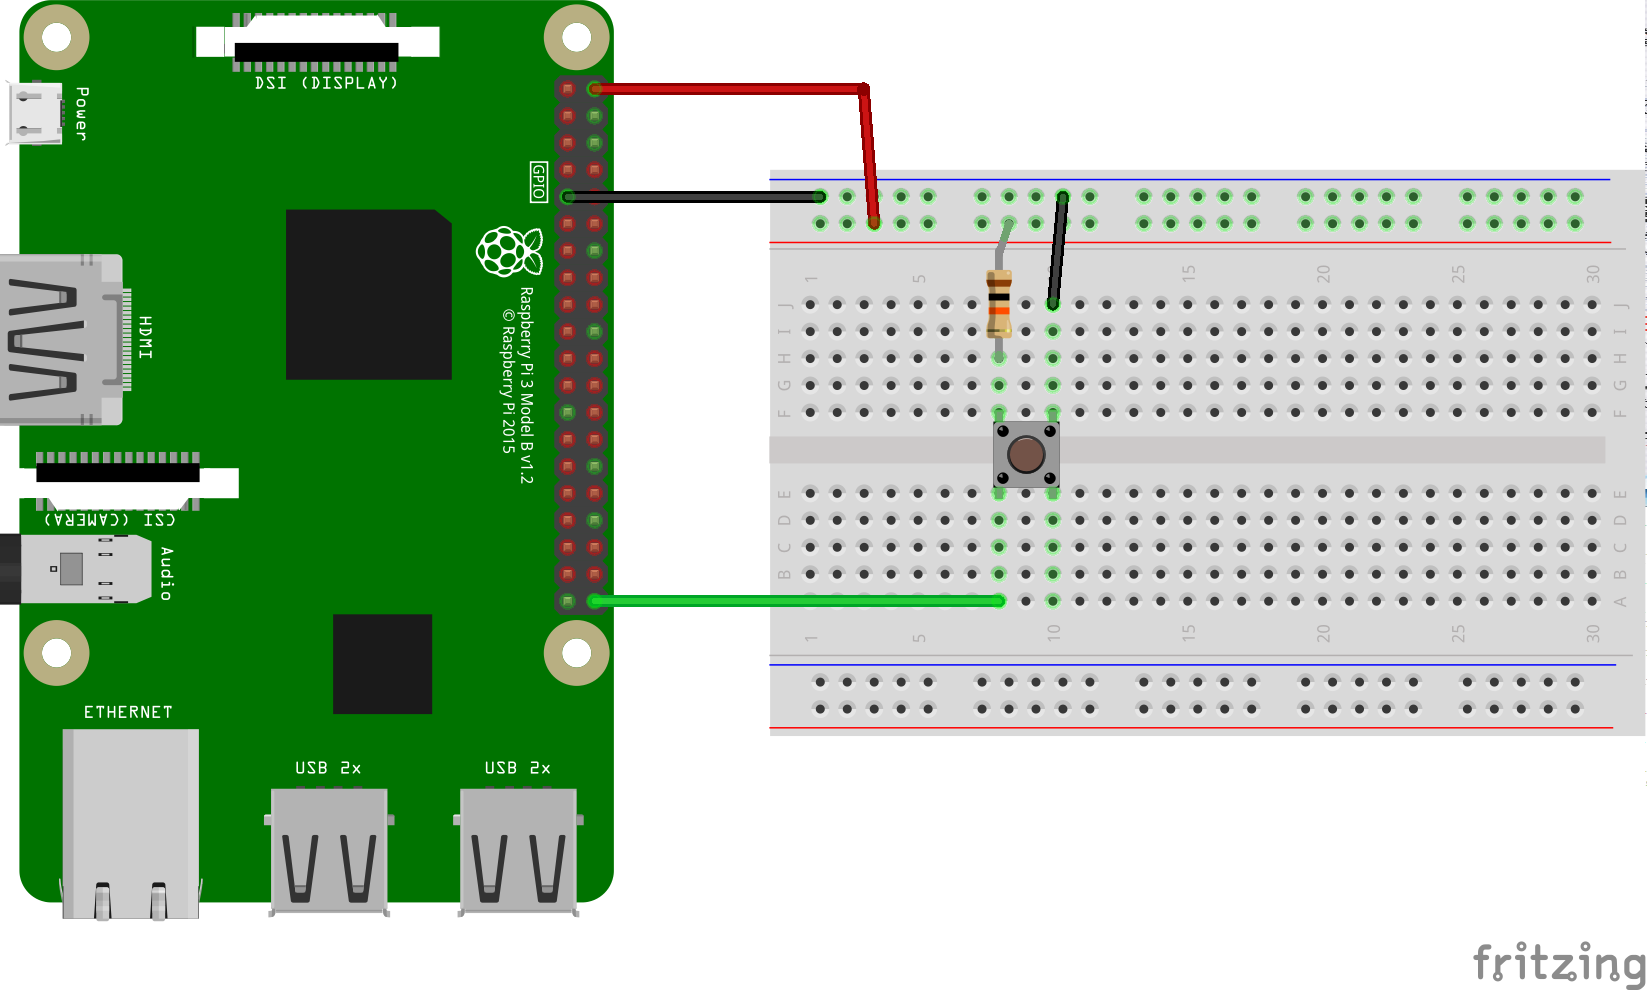
    ./gradlew button:installDebug
    adb shell am start com.example.androidthings.simplepio/.ButtonActivity
Logs to logcat when a button connected to a GPIO pin is pressed. Make sure you use a pull-down or pull-up resistor to avoid fluctuation.
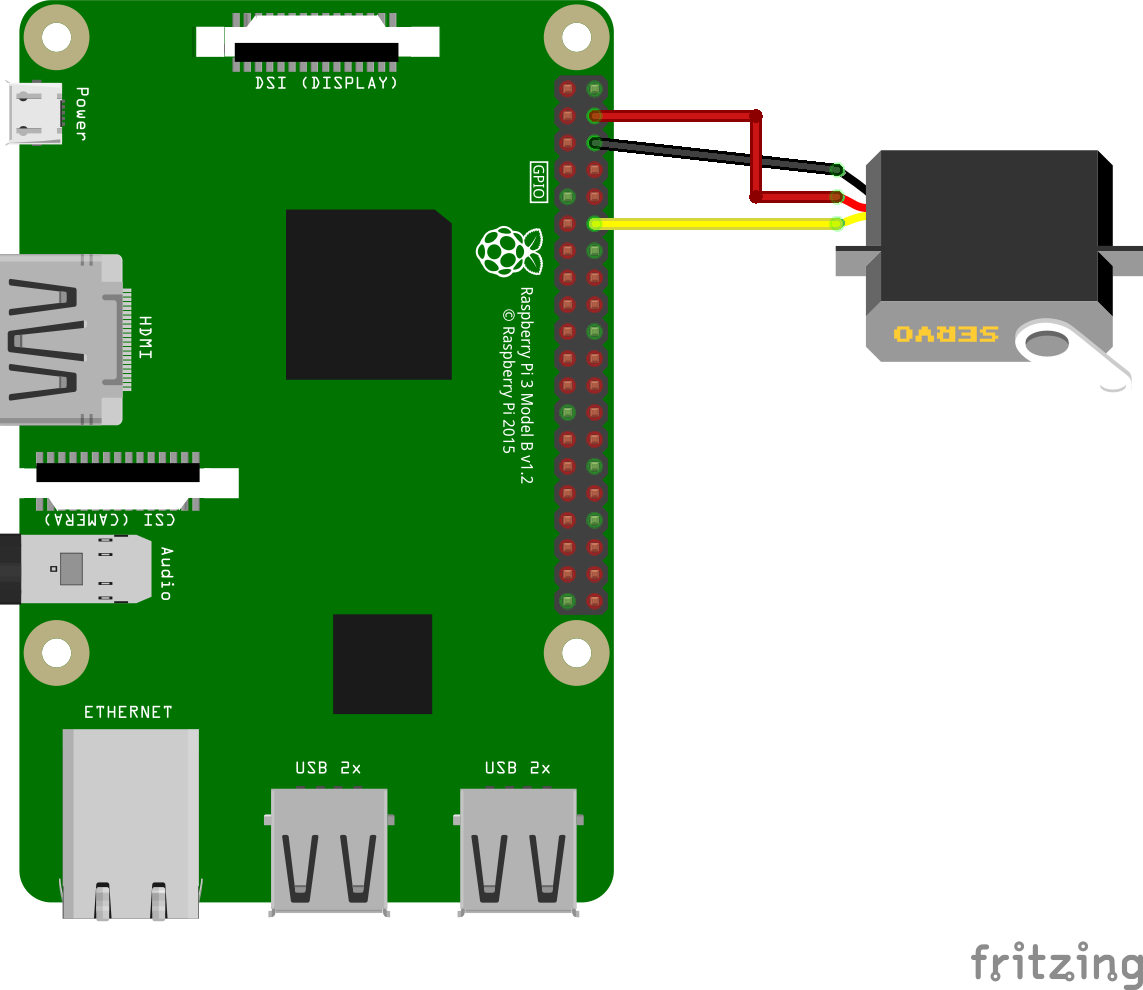
PWM
    ./gradlew pwm:installDebug
    adb shell am start com.example.androidthings.simplepio/.PwmActivity
Moves a servo from one side to the other on regular steps at a predefined rate.
Servos in general have three wires: Vcc, ground and signal. Connect Vcc to the board's Vcc or, ideally, to an external power. Ground should go to the board's ground, and signal goes to the PWM pin specified in the BoardDefaults class. The most common colors for each wire are red for Vin, gray for ground and orange for signal, but confirm with your servo's datasheet to be sure.
License
Copyright 2016 The Android Open Source Project, Inc.
Licensed to the Apache Software Foundation (ASF) under one or more contributor license agreements. See the NOTICE file distributed with this work for additional information regarding copyright ownership. The ASF licenses this file to you under the Apache License, Version 2.0 (the "License"); you may not use this file except in compliance with the License. You may obtain a copy of the License at
http://www.apache.org/licenses/LICENSE-2.0
Unless required by applicable law or agreed to in writing, software distributed under the License is distributed on an "AS IS" BASIS, WITHOUT WARRANTIES OR CONDITIONS OF ANY KIND, either express or implied. See the License for the specific language governing permissions and limitations under the License.
